Connect Retraced to your AI assistant
Ask questions about your Retraced data — orders, styles, materials, certificates — from Claude, ChatGPT, Microsoft Copilot and other AI tools.
- Get an API key. In Retraced, open Company Settings → API Keys → Add API Key and copy the key. If you can’t see it, ask your Retraced account admin. Step-by-step guide
- Pick your tool below.
- Paste your key and follow the steps. Some tools ask for the key later, when you connect them.
Your key is checked once and is not stored by this page. Anyone with the key can read your company’s Retraced data, so treat it like a password. To cut off access, delete it under API Keys at any time.
The connection is read-only: your AI tool can read your Retraced data but not change it.
The Retraced MCP uses the Retraced Public API, so it is only available if the API is part of your Retraced subscription. Not sure, or want to add it? Contact your Customer Success Manager.
Shown in your AI tool’s list of connections.
Paste and check your API key above to see the steps for Claude Desktop.
Prefer not to install anything? Add Retraced as a custom connector instead
Claude Desktop
These steps include your API key. Don’t share them or paste them into shared documents or chats.
Prefer not to install anything? Add Retraced as a custom connector instead
- Download the file, open it, and paste your API key when Claude Desktop asks.
- If double-clicking doesn’t open it: in Claude Desktop go to Settings → Extensions → Advanced settings → Install Extension… and pick the file.
- macOS:
~/Library/Application Support/Claude/claude_desktop_config.json - Windows:
%APPDATA%\Claude\claude_desktop_config.json
- Open that file and merge the block into mcpServers.
- Quit Claude Desktop fully — closing the window is not enough.
- Reopen it; the Retraced tools appear in the tools menu.
- This option needs Node.js installed. If you’re not sure, use the installer above, or ask your IT team.
Claude (web and app): custom connector
You don’t need to paste a key on this page: your AI tool opens a Retraced page where you paste it once.
Free, Pro and Max plans
- Name
- Remote MCP server URL
- In Claude (claude.ai or the desktop app), open Customize → Connectors, then select + Add → Add custom connector.
- Enter the name and URL above. Leave the advanced settings (OAuth client ID and secret) empty, then select Add.
- Select Connect next to Retraced. A Retraced page opens.
- In Retraced, open Company Settings → API Keys → Add API Key, then create and copy the key. If you can’t see that section, ask your Retraced account admin.
- Paste the key on the Retraced page and select Connect.
- Retraced now works in Claude on the web, desktop and mobile. Free plans allow one custom connector.
Team and Enterprise plans
- Name
- Remote MCP server URL
- An Owner opens Organization settings → Connectors, selects Add → Custom → Web, enters the name and URL above, and selects Add.
- Each member then opens Customize → Connectors, finds Retraced, and selects Connect.
- On the Retraced page, each member pastes their own API key (from Company Settings → API Keys in Retraced) and selects Connect.
Claude Code
These steps include your API key. Don’t share them or paste them into shared documents or chats.
- Run it in a terminal. Retraced is then available in Claude Code in every project.
ChatGPT (connectors)
You don’t need to paste a key on this page: your AI tool opens a Retraced page where you paste it once.
ChatGPT admin: add Retraced for your organization
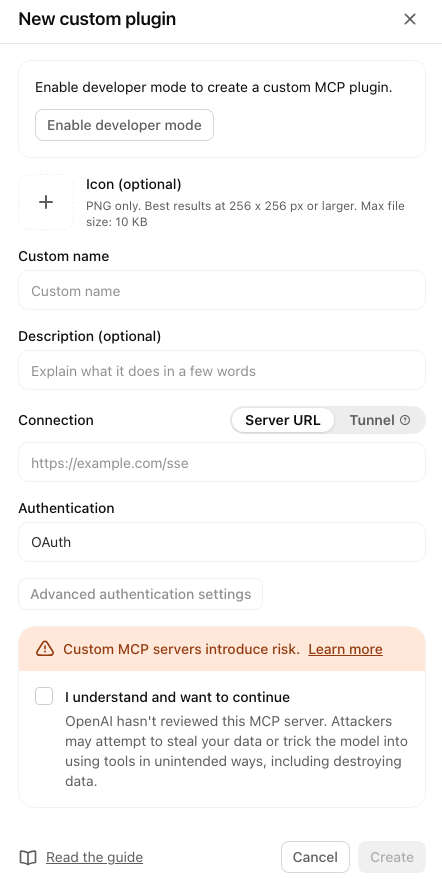
- Custom name
- Server URL
- Authentication
- You need a ChatGPT Business, Enterprise or Edu workspace; Free and Plus cannot add custom plugins. On Enterprise and Edu, an admin may first need to turn on the “Create plugins with MCPs” permission for their role.
- Use ChatGPT on the web in a desktop browser for every step; the desktop and mobile apps cannot complete this setup.
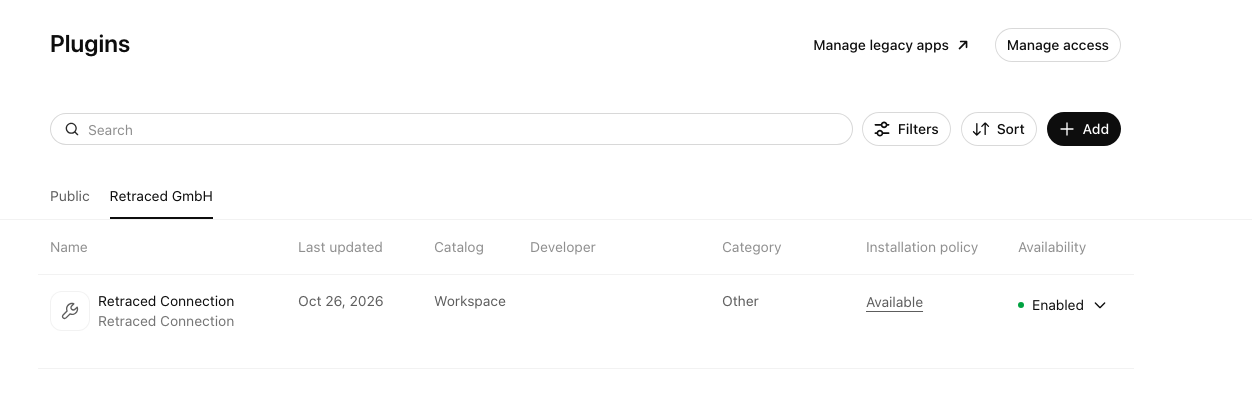
- Open Admin Console → Plugins, select your organization’s tab, then + Add → New custom plugin.
- Enable developer mode if prompted, then enter the values above. OAuth settings are discovered automatically: leave client ID and secret empty. Accept the acknowledgment and select Create.
- Set the plugin to Enabled and make it available for your organization’s users to install.
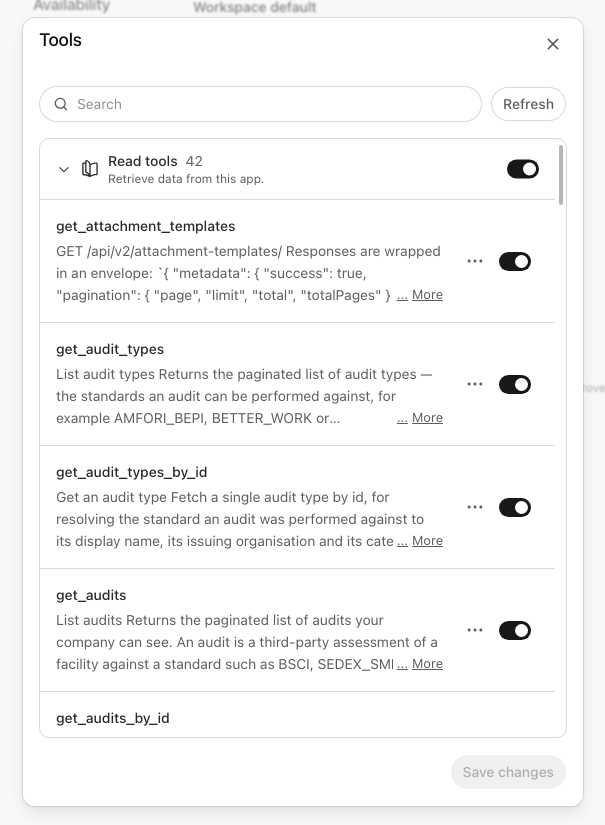
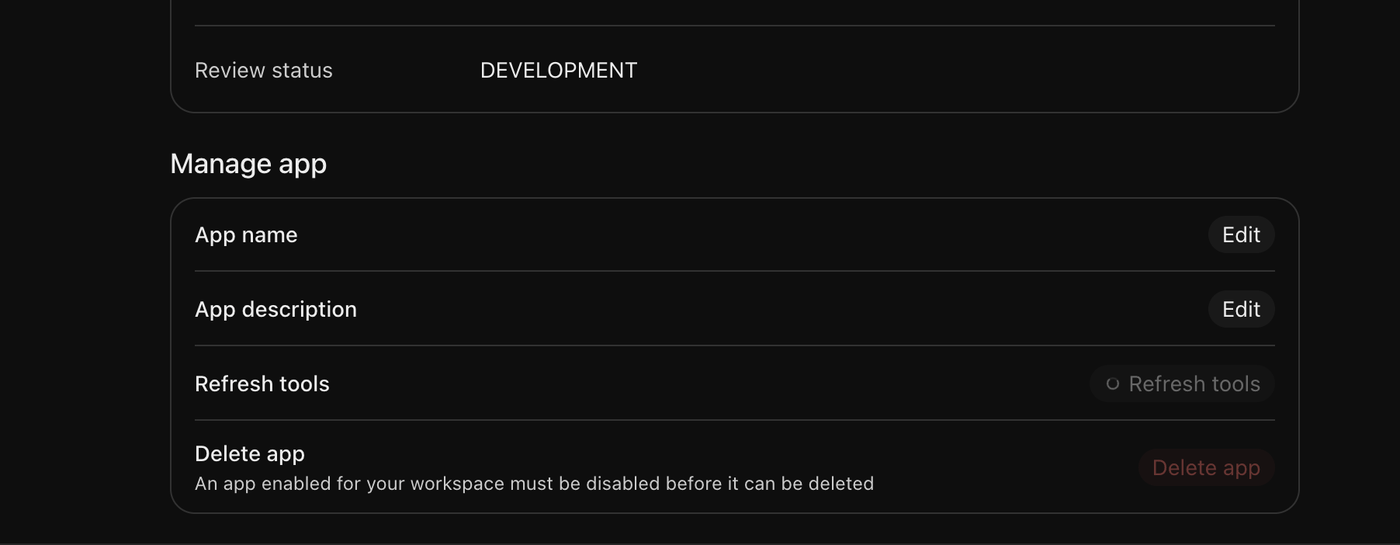
- Open Tools, enable all discovered tools, and select Save changes. Use Refresh if the list is empty.
Each user: install and connect
- Try asking
- In ChatGPT, open Plugins, select your organization’s tab, find Retraced (or the name your admin gave it, such as Retraced Connection), and select + to install it.
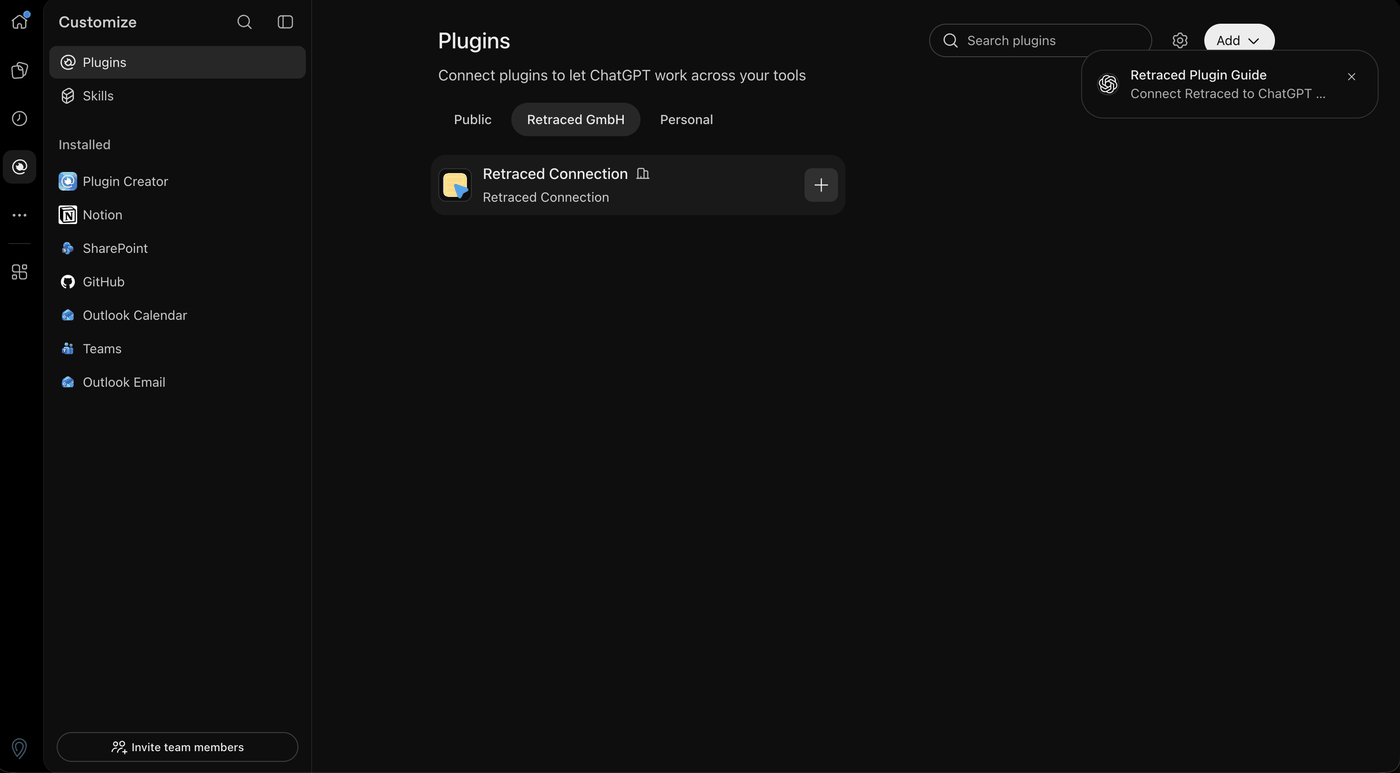
- In the Connect Retraced window, select Continue to Retraced.
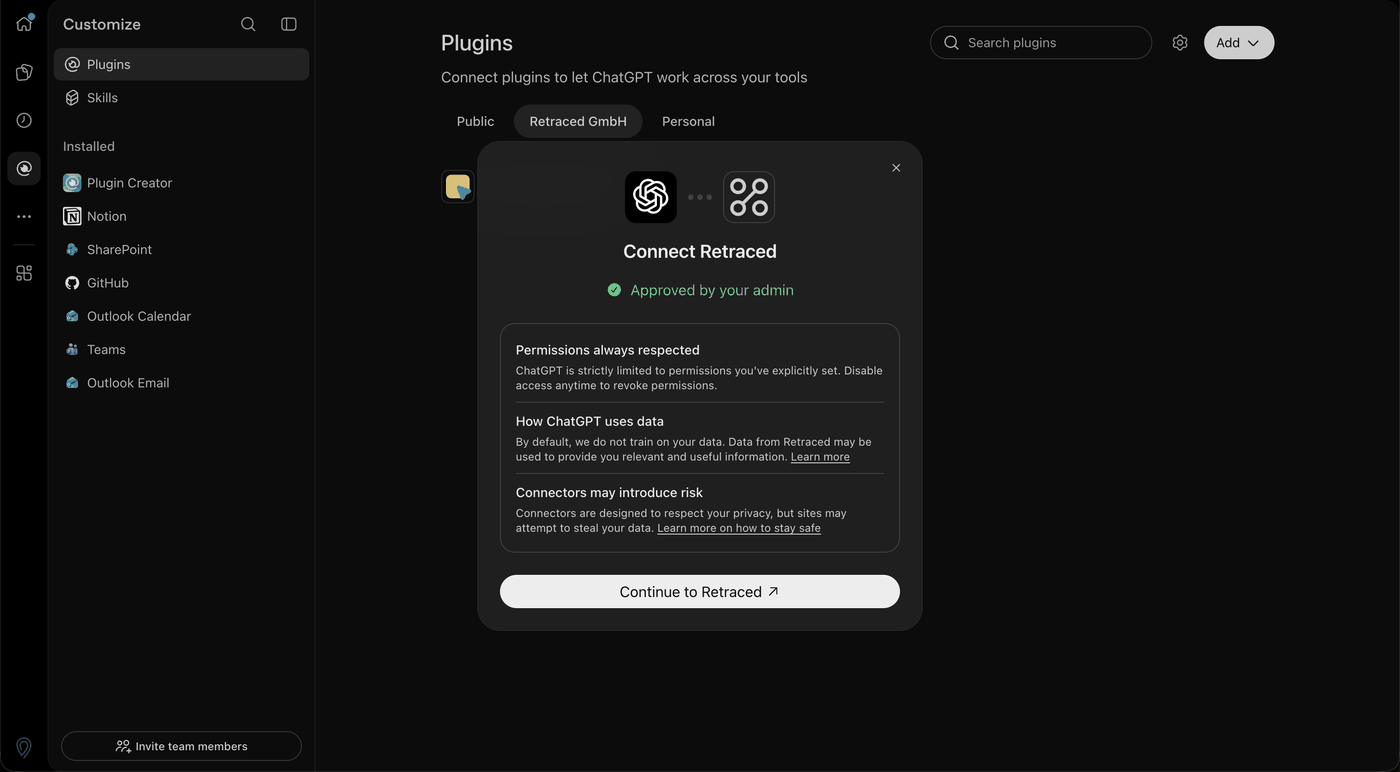
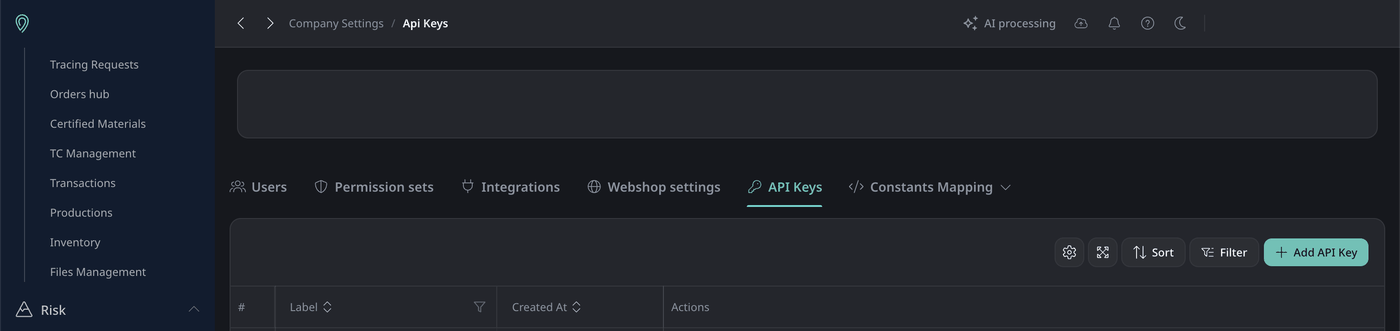
- In your Retraced company account, go to Company Settings → API Keys → Add API Key, then create and copy the key. If you can’t see that section, ask your Retraced account admin.
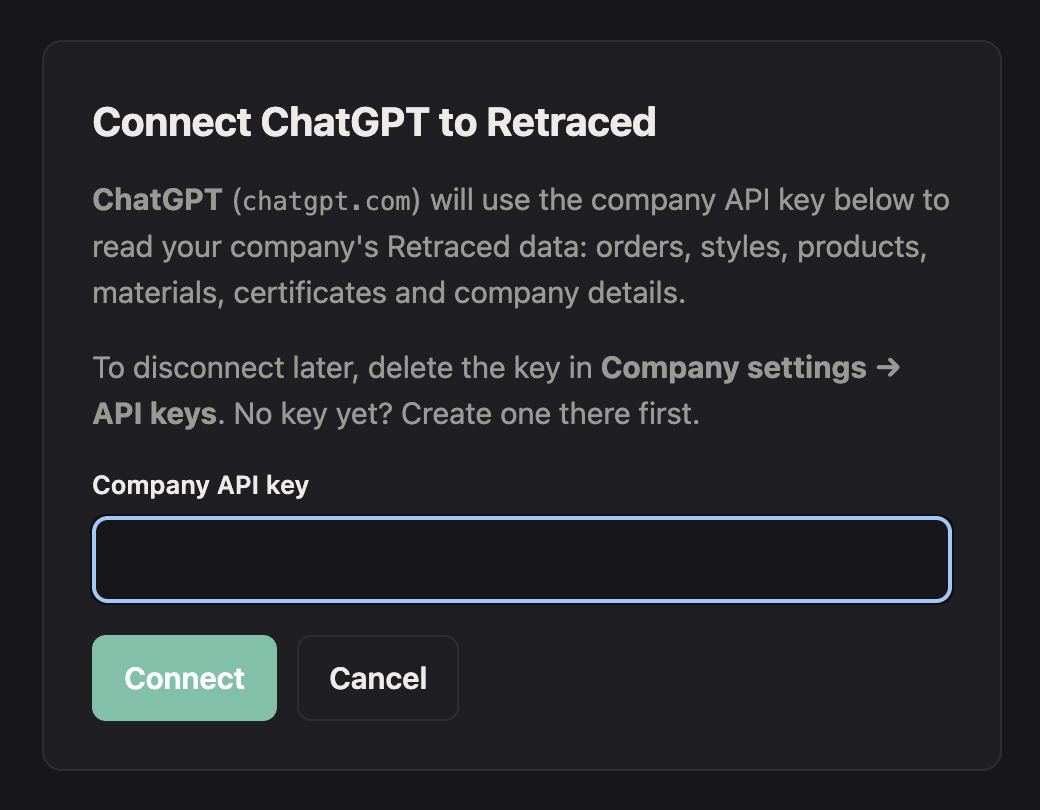
- Paste the key into Company API key on the Retraced page and select Connect. ChatGPT opens again.
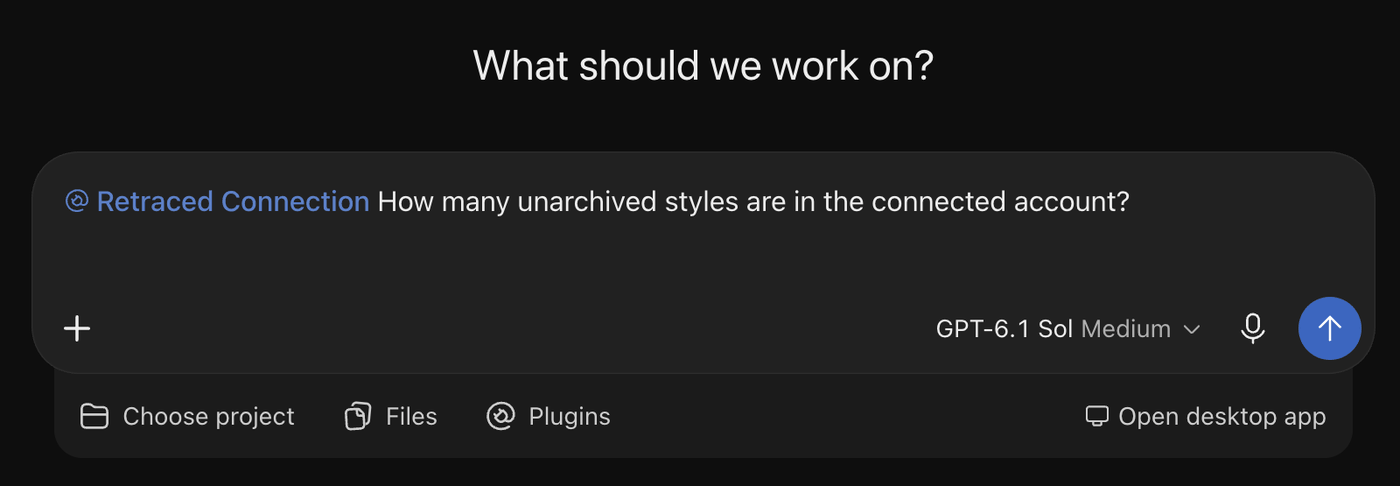
- Start a new conversation, select Retraced under Plugins below the message box (it shows as @Retraced in the message), and ask a question.
- If no tools appear, ask your ChatGPT admin to confirm the plugin and all its tools are enabled, then open the plugin’s settings, select Refresh tools, and connect again if prompted.
Codex CLI and IDE extension
These steps include your API key. Don’t share them or paste them into shared documents or chats.
- macOS / Linux:
~/.codex/config.toml - Windows:
%USERPROFILE%\.codex\config.toml
- Append the block to config.toml, creating the file if it does not exist.
- The Codex CLI and the IDE extension share this file. Restart either one to pick it up.
- Edit the file rather than running "codex mcp add": that command cannot set a custom header.
Copilot Studio (Microsoft 365 Copilot, Teams)
Reach Microsoft 365 Copilot and Teams through a Copilot Studio agent. The consumer Copilot app (copilot.microsoft.com) cannot connect to MCP servers.
These steps include your API key. Don’t share them or paste them into shared documents or chats.
- Server name
- Server description
- Server URL
- Authentication
- Type
- Header name
- API key
- In Copilot Studio, open your agent, go to Tools and select Add a tool → New tool → Model Context Protocol.
- Fill in the server name, description and URL, choose API key → Header, enter the header name, and select Create.
- On Add tool, select Create a new connection, paste the API key, then Add to agent.
- To use it from Teams and Microsoft 365 Copilot, publish the agent and add the Teams and Microsoft 365 Copilot channel.
- If Model Context Protocol only opens a docs page, the wizard is not enabled in your tenant yet; a Power Platform data policy can also block it. Ask your admin.
VS Code (GitHub Copilot)
These steps include your API key. Don’t share them or paste them into shared documents or chats.
- Click it and confirm the install when VS Code asks.
- On a Copilot Business or Enterprise seat, an org admin must first enable the "MCP servers in Copilot" policy. It is off by default.
- Workspace:
.vscode/mcp.json - User:
Command palette → MCP: Open User Configuration
- Merge the entry into "servers". VS Code uses "servers" here, not "mcpServers".
- Keep a workspace file out of git: it contains your key.
- Open Copilot Chat and select Configure Tools; the Retraced tools appear in the list.
Copilot CLI
These steps include your API key. Don’t share them or paste them into shared documents or chats.
- Run it in a terminal. The server is available straight away, no restart.
- On a Copilot Business or Enterprise seat, an org admin must first enable the "MCP servers in Copilot" policy. It is off by default.
- All platforms:
~/.copilot/mcp-config.json
- Merge the entry into "mcpServers". If COPILOT_HOME is set, the file lives there instead.
Cursor
These steps include your API key. Don’t share them or paste them into shared documents or chats.
- Click it and confirm the install when Cursor asks.
- Global:
~/.cursor/mcp.json - Project:
.cursor/mcp.json
- Merge the entry into "mcpServers".
- Keep a project file out of git: it contains your key.
Gemini CLI
These steps include your API key. Don’t share them or paste them into shared documents or chats.
- Run it in a terminal.
- Keep "-s user": without it Gemini writes the server, and your key, into the current project.
- All platforms:
~/.gemini/settings.json
- Merge the entry into "mcpServers". Use "httpUrl": "url" would select the older SSE transport, which Retraced does not serve.
LibreChat
Using OpenRouter? Pick the chat app you use it in. OpenRouter itself cannot call MCP servers.
These steps include your API key. Don’t share them or paste them into shared documents or chats.
Add it yourself
- Name
- MCP Server URL
- Transport
- Authentication
- Header format
- Header name
- API key
- In LibreChat, open MCP Settings in the right sidebar and press +.
- Fill in the MCP Server Builder with these values and save.
- No + button? Ask your LibreChat admin for permission to create MCP servers, or send them the block below.
- Server:
librechat.yaml
- Merge the entry into mcpServers in librechat.yaml and restart LibreChat.
- The block holds no key. Each user opens MCP Settings, presses Configure on the server, and enters their own.
Open WebUI
Using OpenRouter? Pick the chat app you use it in. OpenRouter itself cannot call MCP servers.
These steps include your API key. Don’t share them or paste them into shared documents or chats.
- Type
- URL
- Auth
- Key
- Name
- Open Settings → Admin → Integrations → External Tool Servers and press + Add Connection.
- Fill in these values and save.
- Only admins can add MCP servers. Everyone using this Open WebUI connection shares this key.
LM Studio
Using OpenRouter? Pick the chat app you use it in. OpenRouter itself cannot call MCP servers.
These steps include your API key. Don’t share them or paste them into shared documents or chats.
- Click it and confirm when LM Studio asks.
- In the app:
Program tab → Install → Edit mcp.json
- Merge the entry into "mcpServers" and save.
Cherry Studio
Using OpenRouter? Pick the chat app you use it in. OpenRouter itself cannot call MCP servers.
These steps include your API key. Don’t share them or paste them into shared documents or chats.
- Click it and confirm when Cherry Studio asks.
- Imported servers arrive switched off: turn it on under Settings → MCP Servers.
- In the app:
Settings → MCP Servers → Add → Import from JSON
- Imported servers arrive switched off: turn it on under Settings → MCP Servers.
OpenAI Responses API
These steps include your API key. Don’t share them or paste them into shared documents or chats.
- Set OPENAI_API_KEY in your shell, then run it.
- OpenAI calls Retraced from its own servers and does not keep headers between requests, so send the key with every request.
Anthropic Messages API
These steps include your API key. Don’t share them or paste them into shared documents or chats.
- Set ANTHROPIC_API_KEY in your shell, then run it.
- Anthropic calls Retraced from its own servers and sends the key as Authorization: Bearer, which Retraced accepts.
Server address: https://mcp.retraced.com/mcp